


How To

flower
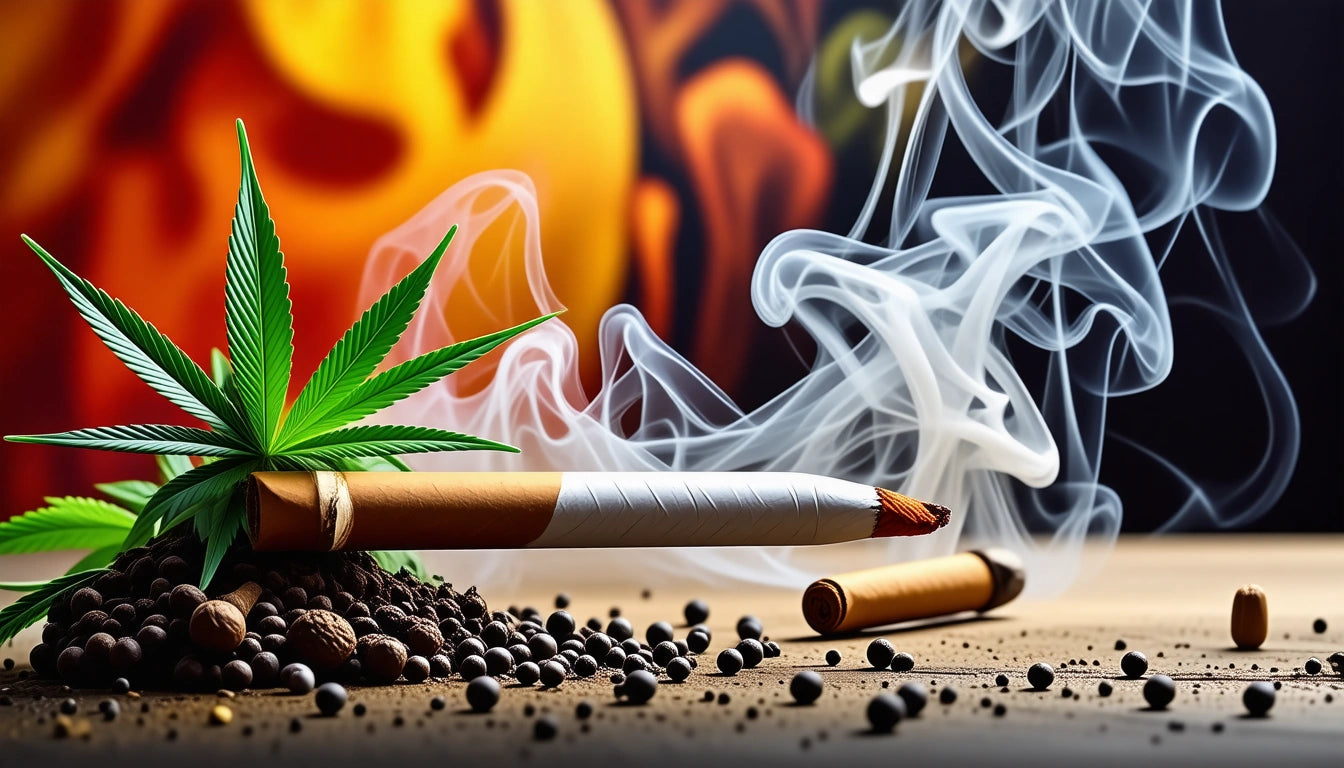
How to Properly Light a Joint to Prevent Canoeing
Table of Contents
Understanding Joint Canoeing: Why It Happens
Proper Joint Rolling: The Foundation for Even Burning
Lighting Techniques That Prevent Canoeing
Rotation Methods for Maintaining Even Burns
Equipment Considerations for Perfect Joint Lighting
Troubleshooting Canoed Joints: Recovery Methods
Mastering Joint Lighting: Practice Makes Perfect
Few things are more frustrating for cannabis enthusiasts than watching a perfectly rolled joint burn unevenly, creating that dreaded canoe effect where one side burns faster than the other. This common problem wastes product and diminishes the smoking experience. Learning how to light a joint so it doesn't canoe is a fundamental skill that enhances enjoyment and maximizes your cannabis consumption.Understanding Joint Canoeing: Why It HappensBefore diving into prevention techniques, it's important to understand why joints canoe in the first place. Canoeing occurs when one side of the joint burns faster than the other, creating an uneven burn line that resembles a canoe. Several factors contribute to this issue:
Uneven distribution of cannabis within the joint
Improper rolling technique leading to air pockets
Lighting the joint unevenly at the start
Wind or air currents affecting the burn
Moisture differences in the rolling paper or cannabis
Understanding these causes is the first step toward preventing a joint from canoeing and enjoying a smooth, even burn.Proper Joint Rolling: The Foundation for Even BurningA properly rolled joint is the foundation for an even burn. No lighting technique can fully compensate for a poorly rolled joint. Follow these steps to create a joint that's less likely to canoe:Grind ConsistencyUse a quality grinder to achieve consistent texture. Cannabis that's ground too finely can burn too quickly, while chunks that are too large create air pockets and uneven burning.Even DistributionWhen filling your paper, distribute the ground cannabis evenly along the length of the joint. Avoid clumps or thin spots that could lead to uneven burning.Proper Packing DensityThe joint should be firm but not too tight. A too-tight pack restricts airflow, while a loose pack creates hot spots. Many professionals use specialized filling equipment to ensure consistent density throughout the joint, which significantly reduces the likelihood of canoeing.Highlight: The most common cause of canoeing is uneven lighting at the start. Taking extra time during the initial light can save your entire joint from burning improperly.Lighting Techniques That Prevent CanoeingThe moment of lighting is critical for preventing canoeing. Follow these techniques to ensure your joint lights evenly:The Rotational MethodThis is the most effective technique for how to light a joint without it canoeing:
Hold the joint between your thumb and index finger
Place the joint in your mouth with the tip barely touching the flame
Rotate the joint slowly while drawing air through it
Take short, gentle puffs rather than deep inhales
Continue rotating until the entire tip glows evenly
This rotation ensures that all sides of the joint receive equal heat, creating an even cherry that will continue to burn uniformly.The Toasting MethodAnother effective approach is to "toast" the tip:
Don't put the joint in your mouth initially
Hold the flame about half an inch below the tip
Slowly rotate the joint above the flame
Let the heat toast the entire circumference of the tip
Once toasted evenly, take a gentle draw to fully light
This method is particularly useful in windy conditions where maintaining an even burn is challenging, as described in this guide on mastering joint lighting techniques.Rotation Methods for Maintaining Even BurnsEven after a perfect light, proper rotation during smoking is essential to maintain an even burn:Continuous RotationAs you smoke, continue to rotate the joint between puffs. This prevents one side from being consistently exposed to more oxygen, which would cause it to burn faster.Strategic PositioningIf you notice one side burning faster, position the joint with the faster-burning side facing up. Since heat rises, this slows down the burning on that side while allowing the slower side to catch up.Equipment Considerations for Perfect Joint LightingThe tools you use can significantly impact your ability to light a joint evenly:Lighter SelectionButane lighters provide a consistent flame that's easier to control than matches. Torch lighters can be too intense and may cause uneven burning. Hemp wick offers a gentler, more controlled flame that many enthusiasts prefer.Rolling PapersThinner papers generally burn more evenly than thick ones. Premium papers with even texture and consistent manufacturing help prevent canoeing. Some papers even feature "run-stopping" technology specifically designed to promote even burning.For consistent results, many commercial operations utilize specialized equipment for joint preparation and preservation, ensuring quality control throughout the process.Troubleshooting Canoed Joints: Recovery MethodsIf despite your best efforts, your joint begins to canoe, there are several recovery techniques:The Lick MethodLightly wet your finger and apply moisture to the faster-burning side. This slows that side down, allowing the other side to catch up. Be careful not to apply too much moisture, which could extinguish the joint entirely.The Burn CorrectionUse your lighter to specifically heat the side that's burning slower. Hold the flame near but not touching the slower side while taking gentle draws. This targeted approach can help even out the burn line.For more detailed recovery techniques, refer to effective solutions for repairing a canoed joint.Mastering Joint Lighting: Practice Makes PerfectBecoming proficient at lighting joints evenly requires practice and attention to detail. By understanding the causes of canoeing, preparing your joints properly, using effective lighting techniques, and selecting the right equipment, you'll significantly improve your smoking experience.Remember that environmental factors like wind and humidity also play a role. In challenging conditions, consider using wind guards or moving to a more controlled environment. With time and practice, properly lighting a joint to prevent canoeing will become second nature, allowing you to enjoy your cannabis without the frustration of uneven burns.For more information on proper joint handling and storage, check out this guide on joint preservation.
flower
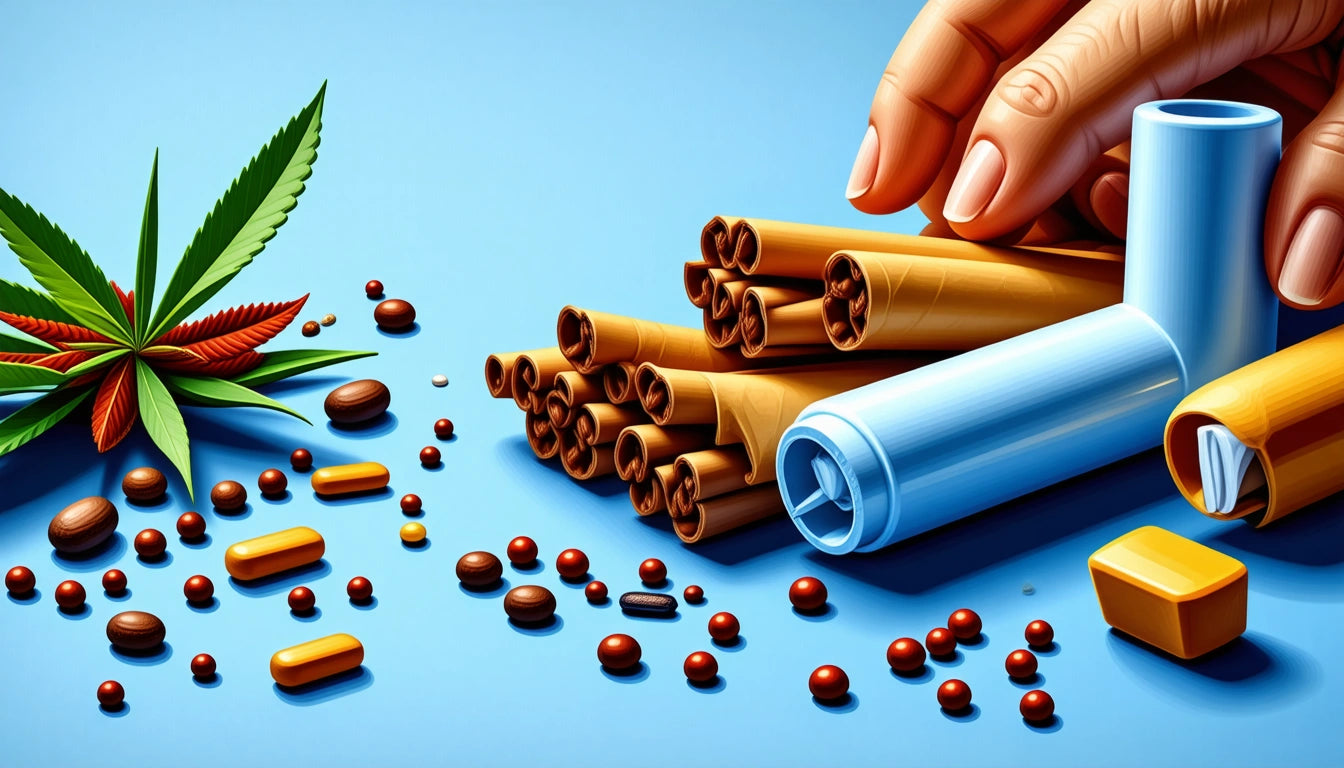
How to Properly Roll and Use RAW Cone Tips
Table of Contents
Understanding RAW Cone Tips: Materials and Benefits
Materials Needed for Rolling with RAW Cone Tips
How to Roll RAW Cone Tips: Step-by-Step Guide
How to Use RAW Cone Tips Effectively
Common Mistakes When Using RAW Cone Tips
Advanced Techniques for RAW Cone Tips
Mastering Your Technique: Practice Makes Perfect
RAW cone tips have revolutionized the rolling experience for cannabis enthusiasts worldwide. These simple yet effective filter tips enhance both the functionality and enjoyment of hand-rolled cones. Whether you're a beginner looking to learn the basics or an experienced roller wanting to refine your technique, understanding how to properly roll and use RAW cone tips is essential for creating the perfect smoking experience.Understanding RAW Cone Tips: Materials and BenefitsRAW cone tips are typically made from unbleached, chlorine-free paper that's designed to be rolled into a small cylinder or cone shape. These tips serve multiple purposes in the rolling process:
They prevent plant material from entering your mouth
They improve airflow for a smoother draw
They provide structural support to maintain the cone's shape
They allow you to smoke more of your material without burning your fingers
Unlike pre-rolled cones that come ready to fill, RAW cones with tips require some assembly, but offer greater customization in terms of size, density, and overall smoking experience.Materials Needed for Rolling with RAW Cone TipsBefore learning how to roll RAW cone tips, gather these essential materials:
RAW filter tips (booklet or roll)
Rolling papers (preferably RAW papers for consistency)
Your preferred ground herb
A clean, flat surface for rolling
A grinder for consistent texture
A small tool for packing (optional)
Quality materials make a significant difference in your rolling experience. When storing your supplies, consider using airtight storage solutions to maintain freshness and prevent moisture damage to your papers and tips.How to Roll RAW Cone Tips: Step-by-Step Guide1. Prepare Your Filter TipStart by taking a RAW filter tip from the booklet or cutting a piece from the roll. The standard size is approximately 0.7 × 1.5 inches (18 × 38mm).2. Create the Initial FoldMake a small accordion fold at one end of the filter paper. This typically involves creating 3-4 small "M" or "W" shaped folds. These folds create the structure that prevents plant material from passing through.3. Roll the Remaining PaperOnce you've made your accordion folds, roll the remaining paper around this folded section to create a cylindrical shape. The tightness of this roll will determine the airflow, so adjust according to your preference.4. Adjust for Cone ShapeFor a true cone tip, roll the filter so one end is slightly wider than the other. This subtle taper helps create the iconic cone shape when incorporated into your roll.Highlight: The accordion fold is crucial for proper filtration. Too loose and material passes through; too tight and airflow is restricted. Aim for 3-4 even folds for optimal performance.How to Use RAW Cone Tips EffectivelyOnce you've mastered how to roll RAW cone filter tips, it's time to incorporate them into your rolling process:1. Position the TipPlace your rolled filter tip at one end of your rolling paper. It should sit flush with the edge or extend slightly (1-2mm) beyond the paper.2. Add Your Ground MaterialDistribute your ground herb along the length of the paper, using less near the filter and gradually more toward the opposite end to create the cone shape.3. Roll and TuckUsing both thumbs and index fingers, roll the paper back and forth to shape the material. Once shaped, tuck the unglued edge of the paper over the filter tip first, then continue tucking along the length.4. Seal and FinishLick the glue strip and seal the paper, starting from the filter end and working your way up. The filter provides a solid point to begin your seal, ensuring a tight finish.For those who prefer a more guided approach, step-by-step guides to filling pre-rolled cones can provide additional insights that apply to hand-rolling as well.Common Mistakes When Using RAW Cone TipsEven experienced rollers can make these common mistakes when working with RAW cone tips:
Rolling too tight: A filter that's too tight restricts airflow and makes drawing difficult
Insufficient accordion folds: Too few folds can allow plant material to pass through
Improper positioning: The filter should be aligned properly with the paper edge
Using wet or damaged filter tips: This compromises structural integrity
Rushing the process: Patience is key to a well-rolled cone tip
Taking your time and focusing on technique will help you avoid these pitfalls and improve your results consistently.Advanced Techniques for RAW Cone TipsOnce you've mastered the basics of how to use RAW cone tips, consider these advanced techniques:Custom-Sized TipsExperiment with different tip lengths and diameters to customize your smoking experience. Longer tips provide more cooling distance, while wider tips allow for greater airflow.Spiral FiltersInstead of the accordion fold, try rolling your filter in a spiral pattern. This creates a different airflow pattern that some users prefer for a smoother draw.Double FiltersFor extra filtration or stability, consider using two filters together. This technique is particularly useful for larger cones or when using advanced packing methods.Glass Tip IntegrationFor a reusable option, learn to incorporate glass tips with your RAW papers for a premium smoking experience.Mastering Your Technique: Practice Makes PerfectBecoming proficient at rolling and using RAW cone tips requires practice and patience. Each session is an opportunity to refine your technique and discover what works best for your preferences. Consider these final tips as you continue to develop your skills:
Keep your hands clean and dry for better paper handling
Practice rolling tips separately before incorporating them into full rolls
Experiment with different tightness levels to find your ideal draw resistance
Consider mastering pre-rolled cones before advancing to hand-rolling with tips
Share techniques with fellow enthusiasts to learn new approaches
Remember that the perfect roll is subjective and depends on your personal preferences. What matters most is creating a functional, enjoyable smoking experience that suits your needs.
flower
How to Use and Pack RAW Cones: A Complete Guide
Table of Contents
Understanding RAW Cones: Basics and Benefits
Preparing Your RAW Cone for Filling
Packing Techniques for Perfect RAW Cones
Manual Packing Method
Using Cone Filling Machines
Understanding RAW Cone Filters and Tips
Common Mistakes When Using RAW Cones
Expert Recommendations for RAW Cone Users
How to Use and Pack RAW Cones: A Complete GuideRAW cones have revolutionized the rolling experience, offering convenience without sacrificing quality. These pre-rolled cones come ready to fill, eliminating the need for rolling skills while delivering the authentic experience RAW products are known for. Whether you're new to using RAW cones or looking to perfect your technique, this comprehensive guide covers everything from basic handling to advanced packing methods.Understanding RAW Cones: Basics and BenefitsRAW cones are pre-rolled papers made from unrefined, natural plant fibers. Each cone comes with a built-in filter tip (also called a crutch) and is ready to be filled with your preferred herb. The appeal of RAW cones lies in their simplicity and consistency, providing an even burn and pure taste that has made them industry favorites.According to our ultimate guide to RAW cones, these products come in various sizes from small (1 ¼) to party-sized (Supernatural), allowing users to select the perfect option for their needs.Preparing Your RAW Cone for FillingBefore learning how to use a RAW cone, proper preparation is essential:
Gently remove the cone from its packaging, being careful not to crush or bend it
Inspect the cone for any tears or defects
Grind your herb to a medium consistency, not too fine or too coarse
Have a clean, flat surface to work on
Prepare a packing tool, such as the RAW packer or a thin, blunt object
Having everything ready before you start filling will make the process smoother and help avoid spills or damage to the delicate paper cone.Packing Techniques for Perfect RAW ConesManual Packing MethodLearning how to pack a RAW cone properly takes some practice, but the basic technique is straightforward:
Hold the cone upright with the filter tip down, supporting it with your fingers
Use your other hand to gradually add ground material into the open end
Gently tap the cone on a hard surface periodically to settle the material
Use a packing tool to press down lightly, working from the filter up
Continue adding material and packing until you reach your desired fullness
Twist the excess paper at the top to seal
For more detailed instructions on manual filling techniques, check out our guide on mastering RAW cone rolling tools and tips.Proper packing is crucial for an even burn. Too tight and it won't draw properly; too loose and it will burn unevenly or too quickly. Aim for a firm but slightly springy feel throughout the cone.Using Cone Filling MachinesFor those who fill multiple cones regularly or want perfect consistency, cone filling machines are invaluable tools. These devices, like those in our collection of premium Futurola filling solutions, can pack multiple cones simultaneously with minimal effort.To use a cone filling machine:
Place empty cones in the designated holders
Add your ground material to the loading chamber
Follow the machine's specific instructions to distribute the material
Remove the perfectly packed cones
Filling machines save time and ensure consistent packing density, making them popular for both personal use and small businesses.Understanding RAW Cone Filters and TipsThe filter tip (or crutch) is a crucial component of any RAW cone. These pre-installed RAW cone filters serve several important functions:
Provide structural support to hold the cone
Prevent herb from entering your mouth
Allow airflow while filtering out particulates
Keep fingers from getting burned as you smoke down to the end
While pre-rolled cones come with filters already installed, it's important to understand how to use RAW cone tips properly. Make sure the filter is firmly seated at the base of the cone before filling. If it seems loose, gently twist it to secure it in place.Some users wonder how to use RAW cone filters when they come separately. These are primarily for hand-rolling, but can be used to replace or reinforce an existing filter in a pre-rolled cone if needed.Common Mistakes When Using RAW ConesEven experienced users can make errors when learning how to fill RAW cones. Here are common mistakes to avoid:
Overpacking: Stuffing too much material or packing too tightly restricts airflow
Underpacking: Not filling enough or packing too loosely leads to uneven burning
Rough handling: The paper is delicate and can tear if handled roughly
Ignoring the filter: Not ensuring the filter is secure before filling
Improper storage: Exposing unused cones to humidity or crushing them in storage
Taking care to avoid these pitfalls will significantly improve your experience with RAW cones. For more insights on proper techniques, explore our comprehensive guide on filling machines and manual techniques.Expert Recommendations for RAW Cone UsersAfter working with countless customers and testing various methods ourselves, we've developed some professional recommendations for getting the most out of your RAW cones:
Invest in quality accessories: A good grinder, packing tool, and storage container make a significant difference
Practice consistent packing pressure: Develop a feel for the right density throughout the cone
Consider humidity: Slightly moist herb packs better than overly dry material
Buy in bulk: Purchasing wholesale provides better value and ensures you always have fresh cones on hand
Explore different sizes: Different occasions call for different cone sizes
For those looking to purchase RAW cones, our guide on pricing and wholesale options provides valuable information on finding the best deals.Understanding how to use RAW cones effectively takes some practice, but the convenience and consistency they offer make them worth mastering. Whether you're filling a single cone for personal enjoyment or preparing multiple pre-rolls for a special occasion, these techniques will help you achieve perfect results every time.

flower
Understanding Why Joints Canoe and How to Prevent It
Table of Contents
What Is Canoeing in Joints?
Common Causes of Joint Canoeing
Prevention Techniques for Even Burns
How to Fix a Canoeing Joint
Tools and Materials for Perfect Joints
Mastering the Art of Joint Rolling for Consistent Burns
Few things are as frustrating for cannabis enthusiasts as watching a freshly rolled joint burn unevenly, with one side burning faster than the other, creating that distinctive canoe shape. This common problem, known as "canoeing," can waste product, deliver an uneven experience, and generally diminish enjoyment. Understanding why joints canoe is the first step toward preventing this issue and ensuring a smooth, even burn every time.What Is Canoeing in Joints?Canoeing occurs when a joint burns unevenly down one side, creating a shape resembling a canoe or boat. One side of the paper burns much faster than the other, resulting in wasted cannabis and an inefficient smoking experience. This uneven burning pattern can lead to frequent relighting, harsh hits, and an overall less enjoyable session.According to our guide on preventing joint canoeing, this issue affects both novice and experienced consumers alike, making it one of the most common complaints among joint smokers.Common Causes of Joint CanoeingUneven Grinding and PackingOne of the primary reasons joints canoe is inconsistent grinding. When cannabis is ground unevenly, with some pieces larger than others, it creates air pockets that cause uneven burning. Similarly, packing too tightly or too loosely in different areas of the joint contributes to irregular airflow.Improper Rolling TechniqueRolling technique plays a crucial role in how evenly a joint burns. Common mistakes include:
Uneven distribution of cannabis throughout the joint
Paper wrinkled or creased during rolling
Inconsistent tightness from end to end
Filter not properly secured
Environmental FactorsExternal factors can also cause joints to canoe:
Wind blowing on one side of the joint
Holding the joint in one position for too long
Humidity affecting paper or cannabis
Uneven lighting technique
Highlight: The most common reason why joints canoe is improper lighting technique, with 65% of cases attributed to not rotating the joint while lighting.Prevention Techniques for Even BurnsPreventing your joint from canoeing starts with proper preparation and technique. Mastering even and slow-burning joints requires attention to several key factors.Proper GrindingUsing a quality grinder ensures cannabis is broken down to a consistent texture. Our premium cannabis grinder selection offers options that produce the perfect consistency for rolling, significantly reducing the likelihood of canoeing by creating uniform material that burns at an even rate.Correct Lighting TechniqueThe way you light your joint significantly impacts how it burns. Proper lighting techniques include:
Rotating the joint while lighting
Using a gentle flame that doesn't scorch the paper
Taking slow, even pulls while lighting
Ensuring the entire tip is lit before smoking
Rolling for SuccessA well-rolled joint is less likely to canoe. Key techniques include:
Distributing cannabis evenly throughout the paper
Maintaining consistent tightness
Using quality rolling papers
Incorporating a proper filter or tip
For beginners, our beginner's guide to rolling the perfect joint offers step-by-step instructions to help avoid common pitfalls.How to Fix a Canoeing JointEven with the best prevention, joints sometimes still canoe. When this happens, there are several ways to address the issue:The Lick and Stick MethodThis technique involves slightly wetting the faster-burning side with saliva and rotating the joint so the wet side is facing up. The moisture slows down the burn on that side, allowing the other side to catch up.The Burn CorrectionAnother approach is to hold the joint with the faster-burning side up and allow it to burn down while not inhaling. This gives the slower side a chance to catch up. Our guide on repairing canoe joints offers detailed instructions on this technique.Tools and Materials for Perfect JointsThe right tools and materials can make a significant difference in preventing joint canoeing:Quality PapersThin, even-burning papers are less likely to canoe. Look for reputable brands known for consistent burning characteristics.Proper GrindersA good grinder produces evenly ground cannabis, eliminating chunks that cause uneven burning. Electric grinders can offer exceptional consistency for frequent rollers.Humidity ControlProperly cured cannabis at the right humidity level burns more evenly. Too dry, and it burns too quickly; too moist, and it burns unevenly.Mastering the Art of Joint Rolling for Consistent BurnsWith practice and attention to detail, you can significantly reduce or eliminate the issue of canoeing joints. The key is developing consistency in your grinding, rolling, and lighting techniques. Our ultimate guide to rolling joints covers various styles and approaches to help you find what works best for your preferences.Remember that even expert rollers occasionally experience canoeing. The difference is that they know how to quickly address the issue when it occurs, minimizing waste and maintaining an enjoyable experience.By understanding why joints canoe and implementing these prevention techniques, you'll be well on your way to consistently even burns and more satisfying smoking sessions. Whether you're a casual consumer or a connoisseur, these principles will help you get the most out of your cannabis experience.
compliance
How to Properly Smoke a Pre-Roll: Tips and Safety
Table of Contents
What is a Pre-Roll and Why Choose One?
Preparing to Smoke Your Pre-Roll
Proper Lighting Techniques
How to Smoke a Pre-Roll Effectively
Inhaling Properly
Pacing Yourself
Common Pre-Roll Issues and Solutions
Safety Considerations When Smoking Pre-Rolls
Pre-Roll Smoking Etiquette and Best Practices
Pre-rolls offer convenience and consistency for both new and experienced cannabis consumers. Whether you're wondering how to smoke a pre-roll for the first time or looking to refine your technique, this comprehensive guide covers everything from basic preparation to advanced smoking methods and safety considerations.What is a Pre-Roll and Why Choose One?A pre-roll is a ready-to-smoke cannabis joint that comes professionally packed and rolled. According to industry experts, pre-rolls eliminate the need for grinding, rolling papers, and the skill required to roll a joint manually. They're available in various sizes, strains, and potency levels to suit different preferences.Pre-rolls are particularly beneficial for beginners who haven't mastered rolling techniques or for anyone seeking convenience. They also ensure consistent dosing and even burning when properly manufactured.Preparing to Smoke Your Pre-RollBefore lighting up, take these preparatory steps:
Choose a comfortable, well-ventilated location where smoking is permitted
Have a lighter or matches ready
Keep a small ashtray or heat-resistant surface nearby
Have water available to stay hydrated
Inspect your pre-roll for any defects or uneven packing
For beginners wondering how to smoke a pre-roll blunt or joint, preparation is key to a positive experience. Check that the pre-roll feels evenly packed and doesn't have any tears in the paper.Proper Lighting TechniquesLighting a pre-roll properly ensures an even burn and better smoking experience:
Hold the pre-roll between your thumb and index finger with the twisted end (tip) facing outward
Rotate the pre-roll while applying the flame to the tip, keeping the flame about half an inch away
Take slow, gentle puffs while rotating to ensure the tip lights evenly
Once lit, take a slightly deeper draw to ensure the cherry (burning end) is evenly lit
Many new users make the mistake of holding the flame too close or not rotating the pre-roll, resulting in "canoeing" (uneven burning down one side). According to experts in pre-roll techniques, proper lighting is fundamental to enjoying the full experience.Highlight: When lighting a pre-roll, always rotate it while applying gentle heat to ensure an even burn and prevent canoeing.How to Smoke a Pre-Roll EffectivelyInhaling ProperlyProper inhalation technique maximizes enjoyment while minimizing harshness:
Take a gentle pull of smoke into your mouth first (like sipping through a straw)
Then inhale the smoke into your lungs with a separate breath of fresh air
Hold briefly (1-2 seconds is sufficient) then exhale slowly
Avoid the common mistake of inhaling too deeply or holding too long
For those wondering how to smoke a joint pre-roll without coughing, this two-step inhalation method helps cool the smoke and reduces throat irritation.Pacing YourselfA common question is "how much of a pre-roll do I smoke?" The answer varies based on your tolerance and experience. For beginners, a few puffs may be sufficient to feel effects. More experienced users might consume half or an entire pre-roll in one session.Remember that you don't have to finish a pre-roll in one sitting. You can extinguish it by gently pressing the lit end against a non-flammable surface and save the remainder for later. Many consumers find that high-quality pre-roll cones with proper filtration allow for a smoother experience that's easier to pace.Common Pre-Roll Issues and SolutionsEven the best pre-rolls can sometimes present challenges:
Canoeing (uneven burning): Rotate the pre-roll and use your lighter to even out the burn
Running too hot: Take slower, gentler puffs and allow more time between inhales
Clogging: Gently massage the pre-roll to redistribute the ground flower
Going out frequently: Take slightly longer draws and ensure proper airflow
Understanding the differences between various pre-roll types can help you select products less prone to these issues.Safety Considerations When Smoking Pre-RollsFor those asking "are pre-rolls safe to smoke," the answer depends on several factors:
Purchase pre-rolls from licensed, reputable dispensaries
Be aware of your tolerance and consume responsibly
Never drive or operate machinery after consuming cannabis
Keep pre-rolls away from children and pets
Always fully extinguish your pre-roll when finished
Be mindful of local laws regarding cannabis consumption
Safety also includes being aware of potential effects and considerations specific to cannabis consumption, particularly for those with underlying health conditions.Pre-Roll Smoking Etiquette and Best PracticesWhen smoking with others, certain etiquette makes the experience more enjoyable for everyone:
If you're sharing, the person who provides the pre-roll typically lights it first
Avoid excessive saliva on the mouthpiece ("wetting" the pre-roll)
Pass to the left in group settings (traditional cannabis culture)
Don't hold the pre-roll too long ("camping") when in rotation
Ash before passing to avoid accidents
These guidelines align with broader joint smoking etiquette and help ensure a positive social experience.Whether you're new to cannabis or simply refining your technique, understanding how to properly smoke a pre-roll enhances both the experience and safety. By following these guidelines, you'll be able to enjoy pre-rolls responsibly while maximizing their potential benefits.
flower
How to Properly Save and Store Joints for Later Use
Table of Contents
Why Save Joints for Later Use
Putting Out a Joint Properly for Future Use
Best Storage Containers for Preserving Joints
Environmental Factors That Affect Joint Quality
Revival Techniques for Saved Joints
Long-Term Preservation Best Practices
Whether you're a casual consumer or a connoisseur, knowing how to save a joint for later use is an essential skill that can help preserve your product and reduce waste. Properly stored joints maintain their potency, flavor, and structural integrity, ensuring a quality experience even days after the initial roll.Why Save Joints for Later UseSaving partially smoked joints or preserving fresh pre-rolls makes practical and economic sense. Many consumers prefer to smoke in smaller sessions rather than consuming an entire joint at once. Learning how to put out a joint to save for later allows you to extend your enjoyment while maintaining the quality of your cannabis experience.According to effective techniques for smoking and preserving a joint, proper storage can extend the shelf life of your products by weeks or even months when done correctly.Putting Out a Joint Properly for Future UseThe first step in saving a joint for later begins with how you extinguish it. Improper methods can damage the structural integrity or affect the flavor profile.Gentle Extinction Methods
Gently tap the burning end against a non-flammable surface until the ember is fully extinguished
Avoid crushing or twisting, which can damage the paper and cause cannabis to fall out
Consider using a joint cap or doob tube that allows you to suffocate the ember without damaging the joint
As detailed in this comprehensive guide on joints, the goal is to minimize oxygen to the burning end without compromising the joint's structure.Highlight: Properly extinguishing your joint is crucial for preservation. Never use water or saliva to put it out, as moisture introduces harmful bacteria and degrades cannabinoids.Best Storage Containers for Preserving JointsThe container you choose plays a significant role in how well your joint will preserve over time. Several options offer varying degrees of protection and convenience.Airtight Options
Doob tubes: Plastic or glass tubes specifically designed for joint storage
Mason jars: Excellent for storing multiple joints in a humidity-controlled environment
Specialized joint cases: Often include humidity control elements
Mylar bags: Our smell-proof mylar storage bags provide excellent protection against oxygen, light, and moisture while maintaining discretion
When selecting a storage container, prioritize airtightness, UV protection, and size appropriateness to minimize air exposure.Environmental Factors That Affect Joint QualityUnderstanding how environmental elements affect cannabis preservation will help you create optimal storage conditions for your joints.The Four Enemies of Cannabis Preservation
Light: UV rays degrade cannabinoids and terpenes
Air: Oxygen exposure accelerates degradation
Temperature: Heat speeds up terpene evaporation and cannabinoid breakdown
Humidity: Too much causes mold; too little dries out the material
The ideal storage environment maintains a temperature between 60-70 °F (15-21 °C) with relative humidity around 59-63%. These conditions help preserve both fresh and partially smoked joints effectively.Revival Techniques for Saved JointsEven with proper storage, a saved joint might need some revival before it's ready to enjoy again. These techniques can help restore a joint that's been stored for a while.Gentle Rehydration MethodsIf your saved joint has become too dry, consider these gentle rehydration methods:
Place the joint in a container with a humidity pack for 2-3 hours
Store with a small piece of orange peel for 1-2 hours (monitor closely to prevent mold)
Use a commercial cannabis humidifier designed for flower preservation
For joints that have been properly stored but need structural reinforcement, these rolling techniques can help you repair any damage before lighting up again.Long-Term Preservation Best PracticesFor those looking to save joints for extended periods, implementing these best practices will ensure maximum preservation of quality and potency.First, consider using specialized joint papers that burn slower and resist humidity changes. These papers help maintain structural integrity during storage and subsequent use. Second, properly curing your cannabis before rolling significantly extends shelf life. Well-cured flower contains the optimal moisture content for long-term storage.Finally, if you frequently save joints for later, consider investing in vacuum-sealed containers that remove all oxygen from the storage environment. This approach is particularly effective for preserving multiple joints for weeks or months.When traveling with stored joints, follow the guidance in this travel advisory to maintain discretion and preservation quality while on the go.By implementing these storage techniques and understanding the factors that affect cannabis preservation, you can effectively save joints for later use without sacrificing quality or potency. Whether you're preserving for a few hours or several weeks, proper storage ensures your joints remain fresh and enjoyable whenever you're ready to consume them.
flower
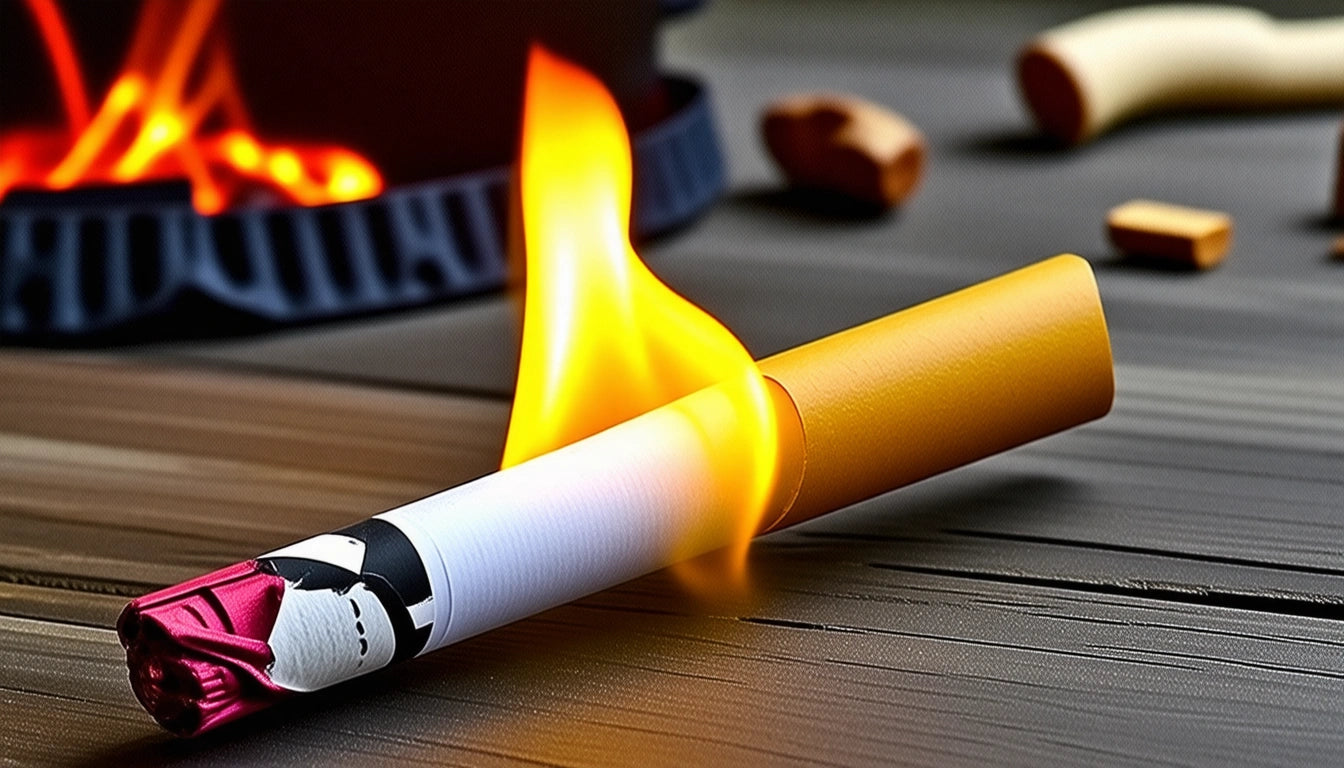
How to Properly Light a Preroll for an Even Burn
Table of Contents
Understanding Preroll Basics
Common Lighting Mistakes to Avoid
Proper Lighting Technique for Even Burns
Tools for the Perfect Light
Troubleshooting Uneven Burns
Maintaining an Even Burn Throughout Your Session
The way you light a preroll can make or break your smoking experience. An improperly lit preroll often leads to frustrating issues like canoeing (when one side burns faster than the other), uneven burning, and wasted product. This guide covers everything you need to know about how to light a preroll evenly for optimal enjoyment.Understanding Preroll BasicsBefore diving into lighting techniques, it's important to understand what makes a quality preroll. A well-constructed preroll should have consistent density throughout, with flower ground to a medium consistency. Too tight and it won't draw properly; too loose and it will burn too quickly.According to experts on pre-roll techniques, the paper quality and how evenly the cannabis is distributed play significant roles in how evenly your preroll will burn. Even the best lighting technique can't fully compensate for a poorly constructed preroll.Common Lighting Mistakes to AvoidMany smokers struggle with how to light a pre roll so it doesn't canoe. The most common mistakes include:
Direct flame application for too long
Lighting only one side of the tip
Inhaling too hard during the lighting process
Failing to rotate the preroll while lighting
Using matches or low-quality lighters that don't provide consistent flame
These errors often result in canoeing, which wastes valuable product and diminishes the overall experience. Preventing canoeing starts with proper lighting technique.Highlight: The key to preventing canoeing is to ensure the entire circumference of the tip is evenly lit before taking your first full draw.Proper Lighting Technique for Even BurnsStep 1: Prepare Your PrerollEnsure the tip is properly twisted or flat, depending on your preference. Some users prefer to gently tap the filter end on a hard surface to settle the flower before lighting.Step 2: The Toasting MethodThe most effective technique for how to light a preroll evenly is the "toasting" method:
Hold the flame about half an inch below the tip of the preroll
Slowly rotate the preroll to heat the entire circumference evenly
Do not inhale during this initial toasting phase
Watch as the tip begins to glow slightly
Once evenly toasted, take a gentle pull while continuing to rotate
This method ensures the entire tip is burning evenly before you begin your session, significantly reducing the chance of canoeing. Mastering this technique takes practice but yields consistent results.Tools for the Perfect LightThe right tools can make a significant difference in achieving an even burn. Consider these options:
Butane lighters: Provide a consistent, windproof flame
Hemp wick: Offers a lower temperature flame for a smoother light
Torch lighters: Perfect for outdoor use in windy conditions
Electric lighters: Flameless option that provides even heating
For commercial operations producing multiple prerolls, specialized filling equipment ensures consistent packing density, which directly contributes to how evenly prerolls burn when properly lit.Troubleshooting Uneven BurnsIf you notice your preroll beginning to canoe despite your best lighting efforts, try these correction techniques:The Wet Finger MethodSlightly moisten your finger and gently touch it to the faster-burning side to slow it down. This allows the slower side to catch up.The Rotation FixRotate the preroll so the faster-burning side faces up. Heat rises, so this position helps the slower side burn more quickly.The Relight MethodIf the burn is severely uneven, you can carefully relight just the slower-burning side. Hold the flame near but not directly on the paper, and rotate slowly.According to safety guidelines for smoking prerolls, it's important to address uneven burns promptly to avoid potential safety issues and product waste.Maintaining an Even Burn Throughout Your SessionOnce you've mastered how to light a preroll properly, maintaining that even burn requires attention throughout your session. Here are some tips for extending that perfect light:
Take slow, measured draws instead of hard pulls
Regularly rotate the preroll between puffs
Gently tap off ash as it accumulates
Shield from wind when smoking outdoors
If you need to set it down, consider using a proper extinguishing technique rather than letting it burn unevenly
Understanding preroll basics like proper storage and humidity control also contributes to better burning characteristics.With these techniques and a bit of practice, you'll master how to light a preroll for an even, enjoyable experience every time. Remember that quality prerolls made with proper equipment and techniques provide the foundation for a great smoke, and your lighting technique is the final crucial step in the process.

flower
How to Make Kief Stick to Your Joint or Preroll
Table of Contents
What is Kief and Why Add it to Joints?
Preparation Steps for Adding Kief to Joints
Sticky Solutions: Adhesives for Kief Application
Application Techniques for Even Kief Distribution
Storage Considerations for Kief-Coated Joints
Advanced Methods for Kief Enhancement
Adding kief to your joint or preroll can significantly enhance potency and flavor, but getting those trichome crystals to adhere properly can be challenging. Many cannabis enthusiasts struggle with kief falling off or burning unevenly. This comprehensive guide explores proven methods for how to get kief to stick to joints and prerolls effectively, ensuring you get the full benefit of these potent cannabis crystals.What is Kief and Why Add it to Joints?Kief refers to the crystalline structures that contain the highest concentration of cannabinoids and terpenes on the cannabis plant. These trichomes detach easily and can be collected in grinders or through sifting. Adding kief to joints provides several benefits:
Increased potency without additional plant material
Enhanced flavor profile from concentrated terpenes
Slower, more even burn when properly applied
Visual appeal with a frosted appearance
Before attempting to apply kief to your joints, understanding its properties helps in choosing the right adhesion method for your preferences.Preparation Steps for Adding Kief to JointsGathering Your MaterialsSuccessful kief application starts with proper preparation. You'll need:
Finely ground cannabis
Rolling papers
Kief collection
A clean, flat surface
Your chosen adhesive agent
Small brush or tool for application (optional)
Container for storage, ideally with airtight caps that preserve freshness if saving for later
Ensure all materials are ready before beginning the rolling process to prevent kief loss during application.Highlight: The quality of your rolling technique significantly impacts kief adhesion. Master the basics of rolling the perfect joint before attempting to add kief for best results.Sticky Solutions: Adhesives for Kief ApplicationNatural AdhesivesSeveral natural substances can help kief stick to your joint or preroll:
Honey: A thin layer of honey creates an effective sticky surface. Apply sparingly using a toothpick or small brush.
Agave Nectar: Similar to honey but with a lighter flavor profile that interferes less with cannabis terpenes.
Cannabis Oil/Distillate: Creates a strong bond while adding potency rather than introducing foreign flavors.
Moisture TechniquesSometimes simple moisture is sufficient:
Licking Method: Lightly dampen the outside of the joint with saliva, then roll in kief immediately.
Water Misting: Use a fine mist sprayer to create minimal moisture on the paper surface.
When using moisture techniques, apply kief immediately before the paper dries to maximize adhesion.Application Techniques for Even Kief DistributionThe Roll MethodFor even coverage on prerolls or freshly rolled joints:
Apply your chosen adhesive in a thin, even layer
Place kief on a clean, flat surface
Roll the sticky joint through the kief, rotating to ensure complete coverage
Gently tap to remove excess
This method works particularly well for commercial prerolls or when preparing multiple joints at once.The Layering MethodFor incorporating kief throughout the joint:
Place a layer of ground cannabis on your rolling paper
Sprinkle a line of kief down the center
Add another layer of ground cannabis
Roll as usual, following proper joint rolling techniques
This method creates a kief core that burns steadily throughout the smoking experience.Storage Considerations for Kief-Coated JointsProper storage preserves the kief coating and prevents it from falling off before use:
Store in a rigid container rather than a soft pouch
Avoid excessive handling or movement
Keep in a cool, dry place to prevent moisture from degrading the adhesive
Consider using doob tubes or joint cases specifically designed for prerolls
For batch preparation, store your kief-coated joints or prerolls in a container with an airtight seal to maintain freshness and potency.Advanced Methods for Kief EnhancementTwaxing TechniqueCombining concentrates with kief creates an extremely potent joint:
Apply a thin line of concentrate (wax, shatter, etc.) to the outside of your rolled joint
Heat slightly with a lighter held at distance to make the concentrate tacky
Roll immediately in kief
Allow to cool and set before smoking
This method requires practice but creates a slow-burning, high-potency experience. Learn more about advanced joint smoking techniques to maximize your experience.Inside-Out ApplicationFor those who prefer kief mixed throughout:
Mix kief directly with your ground cannabis before rolling
Use slightly more moisture when licking the adhesive strip
Roll as normal, taking care not to lose kief during the process
This method distributes kief evenly throughout the joint for consistent potency.Troubleshooting Common IssuesIf you're experiencing problems with your kief application:
Falling Off: Your adhesive may be too thin or dry. Apply more or try a stickier alternative.
Uneven Burning: Too much kief in one area can cause canoeing issues. Aim for even distribution.
Harsh Taste: Your adhesive may be burning improperly. Consider using cannabis-derived options instead of sugars.
Maximizing Your Kief-Enhanced ExperienceGetting kief to stick to your joint or preroll is just the beginning. To truly elevate your experience, consider these final recommendations:
Pair kief types with complementary cannabis strains to create custom flavor profiles
Experiment with different adhesives to find your personal preference
Consider investing in a multi-chamber grinder to collect more kief over time
Try combining kief application with creative rolling techniques for unique experiences
With these methods and considerations, you'll master how to get kief to stick to prerolls and joints, creating enhanced cannabis experiences with minimal waste and maximum effect. The extra effort results in a more potent, flavorful, and visually impressive joint that elevates your cannabis ritual.

concentrates
How to Properly Incorporate Wax into a Joint
Table of Contents
Understanding Cannabis Concentrates for Joints
Methods for Adding Wax to Your Joint
Inside Joint Technique: The Core Method
Outside Joint Technique: The Twaxing Method
Handling Wet Joints: Prevention and Solutions
Equipment Recommendations for Wax-Enhanced Joints
Maximizing Your Enhanced Joint Experience
Adding concentrates to a joint, commonly known as "twaxing," has become increasingly popular among cannabis enthusiasts looking to enhance their smoking experience. When you properly incorporate wax into a joint, you can significantly increase potency while enjoying the combined effects of flower and concentrates. This guide covers everything you need to know about this technique, from preparation to consumption.Understanding Cannabis Concentrates for JointsBefore attempting to add wax to your joint, it's important to understand what you're working with. Cannabis concentrates come in various consistencies, from sticky oils to more solid forms like shatter or crumble. Each type requires slightly different handling techniques:
Oils and sauces: Highly viscous, requiring tools for application
Budder and badder: Creamy consistency, easier to work with by hand
Shatter: Glass-like texture that needs to be broken down
Crumble and dry wax: Easiest to incorporate inside joints
The concentration of cannabinoids in these products is significantly higher than flower, often ranging from 60-90% THC compared to flower's typical 15-25%. This potency difference is why many users choose to enhance their joints with concentrates.Methods for Adding Wax to Your JointThere are two primary methods for incorporating wax into a joint: the inside method and the outside method (twaxing). Each offers different benefits and experiences.Highlight: When adding wax to a joint, always start with a small amount (about 0.1-0.2g) until you understand how it affects your experience, as concentrates significantly increase potency.Inside Joint Technique: The Core MethodThe inside method involves mixing concentrates with your ground flower before rolling:Step-by-Step Process:
Grind your flower to a medium consistency
Warm your concentrate slightly to make it more malleable
Break the concentrate into small pieces or thin strips
Mix the concentrate evenly with your ground flower
Roll your joint as you normally would, following proper rolling techniques
This method ensures even distribution of the concentrate throughout the joint, providing a consistent experience from start to finish. It's ideal for beginners or those who prefer a more controlled session.Outside Joint Technique: The Twaxing MethodThe outside method, often called "twaxing," involves applying concentrate to the exterior of an already rolled joint:Step-by-Step Process:
Roll a joint with just flower first
Warm your concentrate until it becomes sticky but not runny
Using a dab tool, apply the concentrate in a spiral pattern around the outside of the joint
For oils, use a syringe to create lines along the paper
Allow the concentrate to cool slightly before handling
This method creates a visually impressive joint and can deliver intense hits as the concentrate melts into the burning paper. However, it can be messier and less efficient than the inside method, as some concentrate may drip off during smoking.Handling Wet Joints: Prevention and SolutionsAdding concentrates can sometimes lead to wet or difficult-to-light joints. Here's how to address these issues:How to Dry a Wet Joint:
If your joint becomes too wet from concentrate, gently warm it with a lighter held several inches away
Allow it to sit in a dry, warm place for 10-15 minutes
Use proper lighting techniques that evenly toast the tip before inhaling
Consider using a slightly thicker rolling paper when incorporating concentrates
Proper storage is also crucial for maintaining the quality of your enhanced joints. We recommend using airtight containers with secure lids, such as those found in our collection of child-resistant caps and jar lids designed specifically for preserving cannabis products.Equipment Recommendations for Wax-Enhanced JointsHaving the right tools makes incorporating wax into joints much easier:
Dab tools: Metal or glass tools with flat or pointed ends for handling concentrates
Silicone mat: Provides a non-stick surface for working with concentrates
Parchment paper: Useful for storing and warming concentrates
Grinder with kief catcher: Allows you to add kief as an additional enhancement
Quality rolling papers: Thicker papers work better with concentrates
Investing in quality tools will make the process cleaner and more efficient, leading to better results and less wasted product.Maximizing Your Enhanced Joint ExperienceTo get the most from your wax-enhanced joint, consider these final recommendations:
Pair complementary strains and concentrates for tailored effects
Use a filter or glass tip to prevent concentrate from being drawn into your mouth
Take slower, gentler draws to allow the concentrate to vaporize properly
Be mindful of the increased potency and adjust your consumption accordingly
Learn proper storage techniques to preserve your enhanced joints for later use
With practice, you'll develop your preferred method for incorporating wax into joints, creating a personalized experience that maximizes both the flower and concentrate properties. Remember that the combination will be significantly more potent than flower alone, so adjust your consumption accordingly and enjoy responsibly.